

The subway tile was born in the New York City underground railway stations of the early 1900s. Its designers chose it for practical reasons: it was easy to clean, reflected the limited light of those underground spaces, and could be produced cheaply in large quantities. Nobody intended it to become one of the most enduring icons of interior design. And yet, here we are.
Today, white subway tile appears in everything from budget-friendly rental renovations to award-winning luxury kitchens. It turns up in farmhouse kitchens, Scandi-minimal spaces, industrial lofts, traditional English country kitchens, and contemporary open-plan homes. The reason is not that it’s boring or safe. The reason is that it’s genuinely, reliably excellent — and that it offers far more creative range than most people initially appreciate.
That last point is what this guide is really about. Because ‘white subway tile backsplash’ is not a single choice. It’s a starting point with dozens of directions available — different grout colours, laying patterns, tile finishes, sizes, and supporting design elements that can take the same fundamental material and produce results that look almost nothing alike.
1. Classic White Subway Tile in a Traditional Brick Lay

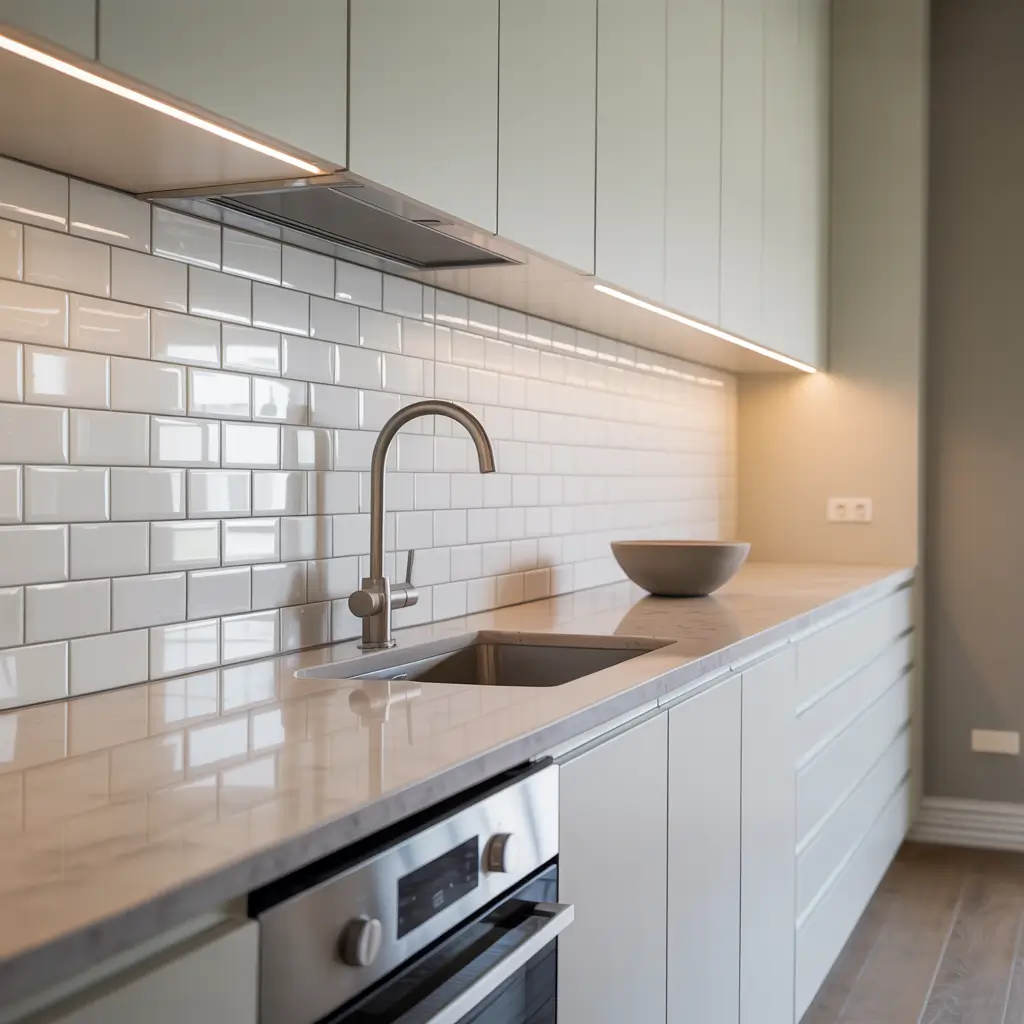
Before exploring the variations, it’s worth spending a moment with the original. The standard brick-lay pattern — rows of rectangular tiles offset by half a tile’s width, exactly as bricks are laid in a wall — is the configuration that defined the subway tile aesthetic and the one that remains most widely used today.
In a kitchen, the traditional brick-lay pattern creates a clean, ordered surface that has a natural authority to it. It doesn’t demand attention, but it satisfies the eye in the way that well-proportioned things do. Paired with white or off-white grout in a tight joint, it almost disappears into the wall — providing a seamless white backdrop that makes everything else in the kitchen feel more composed.
When the Classic Really Is the Best Choice
If your kitchen has a lot going on elsewhere — bold cabinet colours, dramatic countertop patterns, statement lighting — the traditional brick-lay subway tile is almost certainly the right call. It provides visual calm without being dull, and it will never clash with or compete against the things around it.
✅ Pro Tip: For the most seamless, expansive look, choose a white grout that closely matches the tile colour. The individual tiles recede and the surface reads as a continuous white plane.
2. White Subway Tile with Dark Charcoal Grout
If the classic configuration is where white subway tile blends in, the dark grout combination is where it steps forward and makes a statement. Charcoal, anthracite, or graphite grout against white tiles creates a bold grid pattern that emphasises the geometry of the layout and gives the backsplash genuine visual presence.
The effect is graphic and confident without being aggressive. It suits contemporary kitchens particularly well, where clean lines and defined forms are already part of the design vocabulary. It also has an unexpected warmth to it when the grout tone is brown-grey rather than blue-grey.
Choosing Your Dark Grout Shade
- Charcoal grey — the most versatile, suits both cool and warm kitchen tones
- Anthracite — slightly darker, with more blue-grey character
- Graphite — for a stronger contrast that really makes the grid pop
- Dark warm grey — subtler, suits kitchens with timber or terracotta elements
A word on grout joint width: the wider the joint, the more prominent the grid. For maximum graphic impact, go for a six- to eight-millimetre joint. For something more restrained, a three- to four-millimetre joint with dark grout still provides contrast without dominating.
✅ Pro Tip: Dark grout has one very practical advantage: it hides everyday splashes and discolouration far better than white or light grout. In a hardworking kitchen, this is not a minor consideration.
3. Herringbone Pattern White Subway Tile
The herringbone pattern transforms the humble rectangular tile into something that belongs in a design magazine. By rotating each tile 45 degrees and arranging them in a V-shaped zigzag, you introduce movement, direction, and a sense of craftsmanship that the standard brick lay simply cannot replicate.
The effect is particularly striking above a kitchen range or hob, where the backsplash forms a tall, visible rectangle. The dynamic angles of the herringbone pattern in this space create an almost architectural focal point — your backsplash becomes a design feature rather than a background element.
Practical Notes for Herringbone Installation
- You will need approximately 15 to 20 percent more tiles than a standard lay to account for the angled cuts at the edges
- The pattern requires careful planning from a central start point — a slightly off-centre beginning will be visible and difficult to correct
- Rectified tiles (cut to precise dimensions) make herringbone significantly easier to execute neatly
- If you are not experienced with tile work, this pattern is worth hiring a professional for — the difficulty is in the setup, not the tiling itself
✅ Pro Tip: A herringbone pattern in white tile with white grout is understated luxury. A herringbone pattern with dark grout is graphic and bold. Choose based on how much presence you want the backsplash to have.
4. Vertical Stack Bond White Subway Tile

The vertical stack bond is one of the simplest and most effective ways to make white subway tile feel fresh and contemporary. Instead of the traditional horizontal brick lay, tiles are stacked directly on top of each other in a perfect grid, then rotated 90 degrees so the long edge runs vertically rather than horizontally.
The result is a backsplash that has a distinctly modern character — taller, narrower tile proportions that draw the eye upward and make ceilings feel higher. In a kitchen with standard ceiling heights, this is a genuinely useful optical trick. In a room with already generous ceiling height, it becomes simply beautiful.
Vertical tiles also suit narrow backsplash spaces particularly well — between a window and a cabinet, for example — where horizontal tiles can create too many awkward cuts at the edges.
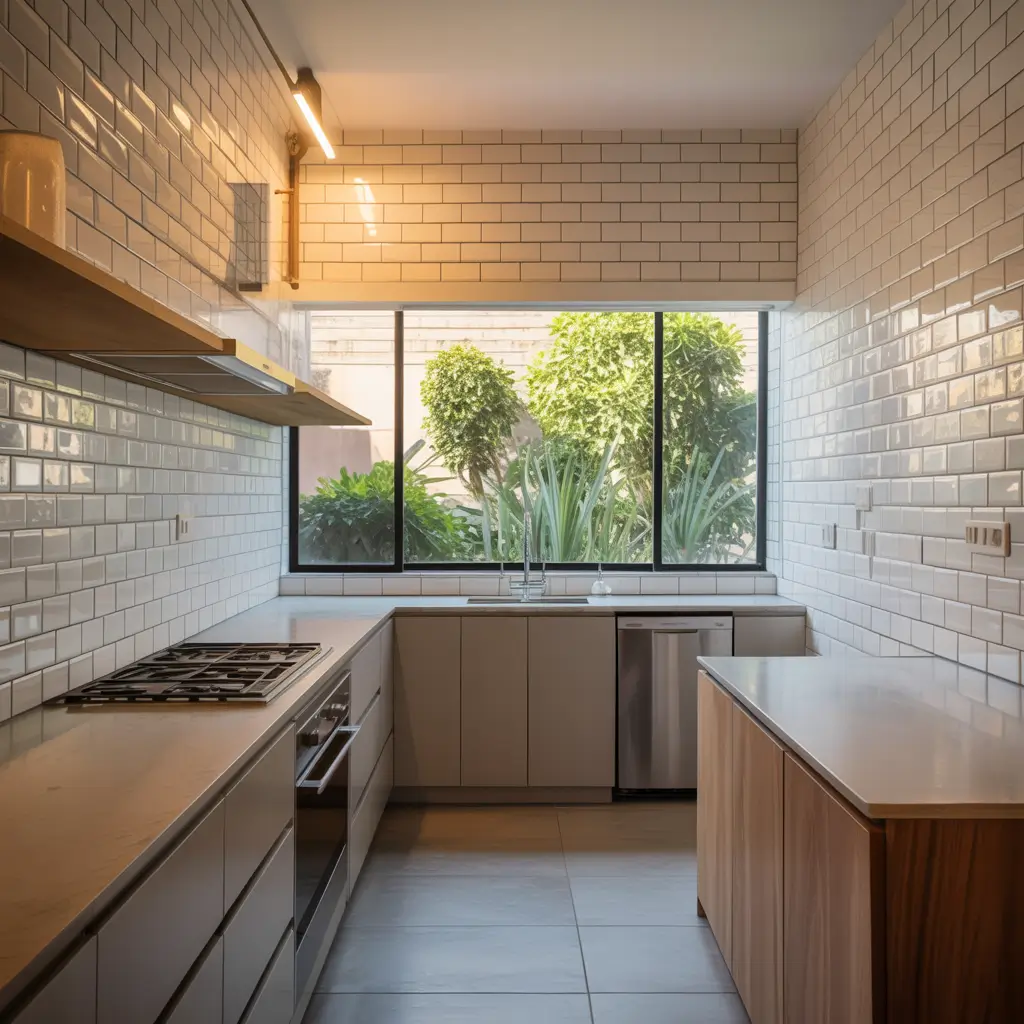
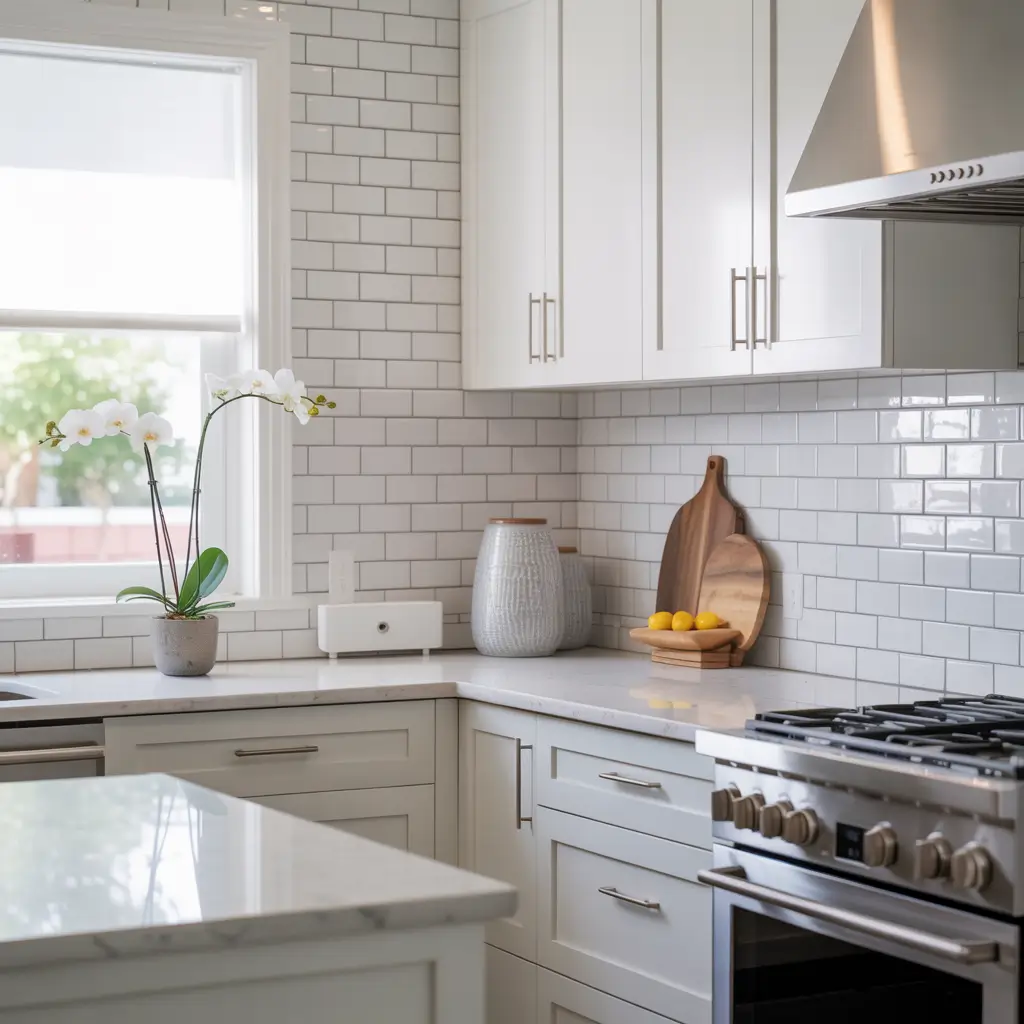
5. White Subway Tile Floor-to-Ceiling Backsplash
Most kitchen backsplashes occupy only the space between the countertop and the underside of the upper cabinets. But taking white subway tile all the way from the counter to the ceiling — or from the floor to the ceiling in a range alcove — is a transformation in scale that changes the character of the entire kitchen.
A full-height subway tile treatment makes the kitchen feel taller, more resolved, and more deliberate. It’s the difference between a backsplash and a tiled room — and in an open-plan space where the kitchen is visible from a living area, the continuous white surface creates a clean, architectural backdrop that photographs beautifully and ages extremely well.
Where This Works Best
- Behind a range or hob — creates a dramatic focal alcove
- In a galley kitchen — the continuous surface unifies both sides of the space
- In a kitchen with particularly high or awkward ceilings — tiles give the space structure
- Alongside open shelving — the tile continues behind the shelves for a seamless look
6. White Subway Tile with Coloured Grout
Most people think of grout as a practical necessity rather than a design opportunity, but coloured grout with white subway tiles is one of the most creative and affordable ways to personalise a backsplash.
Warm terracotta grout with white tiles creates a Mediterranean warmth that suits earthy, natural kitchens. Soft sage green grout gives white tiles a botanical, slightly retro character that works brilliantly in kitchens with natural timber elements. Navy blue grout with white tile creates a crisp, nautical graphic that suits coastal and Hamptons-style spaces.
The beauty of this approach is that it requires no additional tile cost — the creativity comes entirely from the grout selection. And if you ever tire of the combination, regrouting (while not a trivial job) is significantly cheaper and less disruptive than retiling entirely.
✅ Pro Tip: Test your grout colour on a small area before committing to the full installation. Grout colour can look quite different on the tile compared to the colour chip in the shop, particularly once it dries and cures.
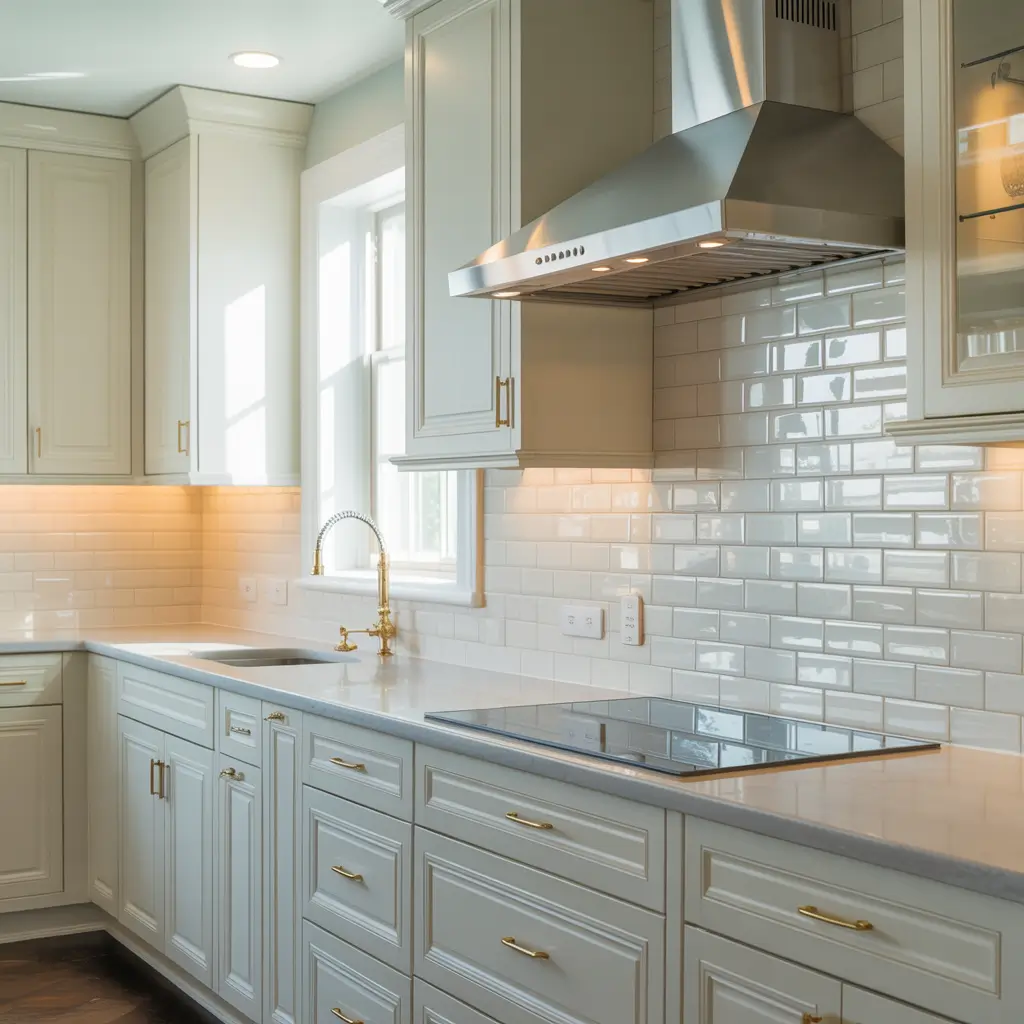
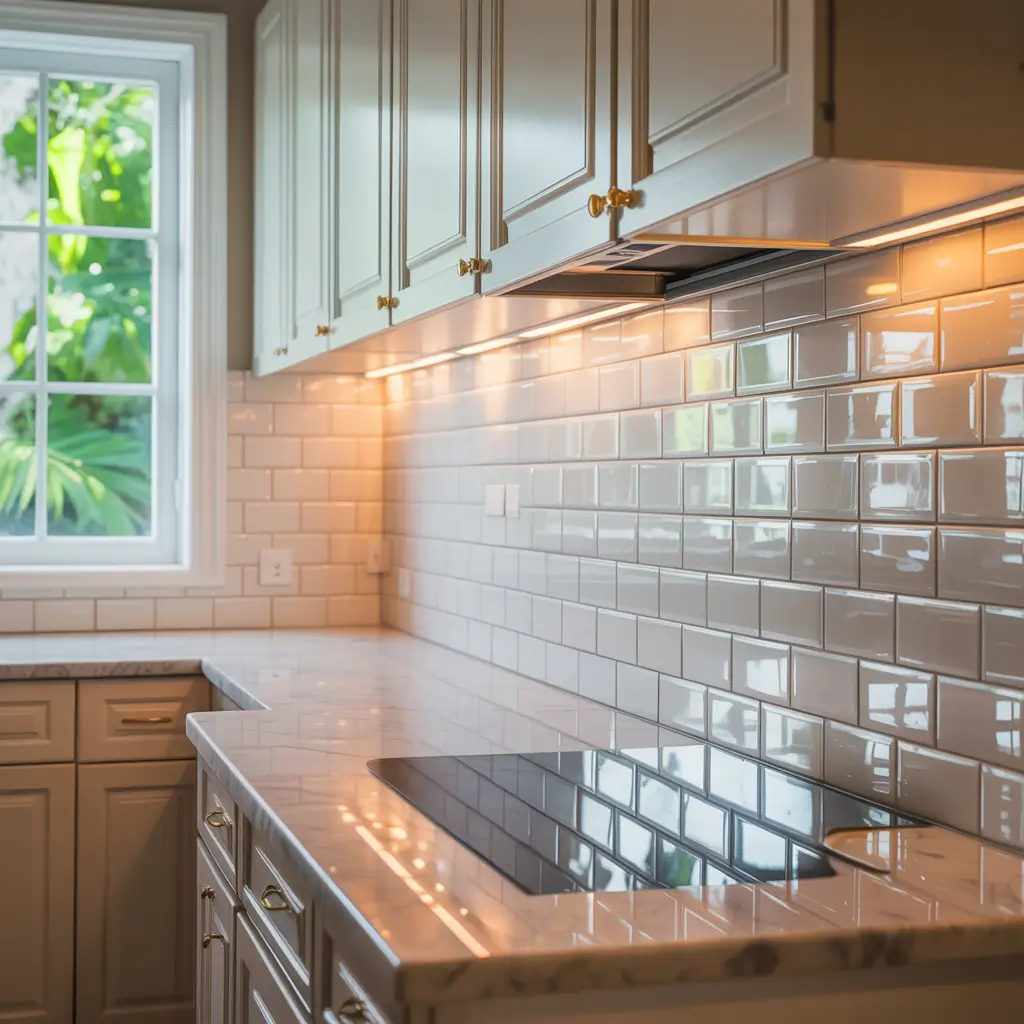
7. Bevelled White Subway Tile for Added Dimension
A standard subway tile has a flat face. A bevelled subway tile has angled edges that slope slightly inward toward the centre of the tile, creating a subtle three-dimensional quality that catches light and produces gentle shadow lines along every grout joint.
The effect is quiet but beautiful — like the difference between a flat sheet of paper and a book cover with an embossed title. Both are white, both are rectangular, but one has depth and the other does not. In a kitchen with good natural light, bevelled subway tiles shift and shimmer slightly as the angle of the light changes throughout the day.
Bevelled tiles suit traditional, transitional, and farmhouse kitchens particularly well. In very minimal or contemporary spaces, the additional texture can sometimes work against the clean simplicity of the design — in those cases, a flat tile is the better choice.
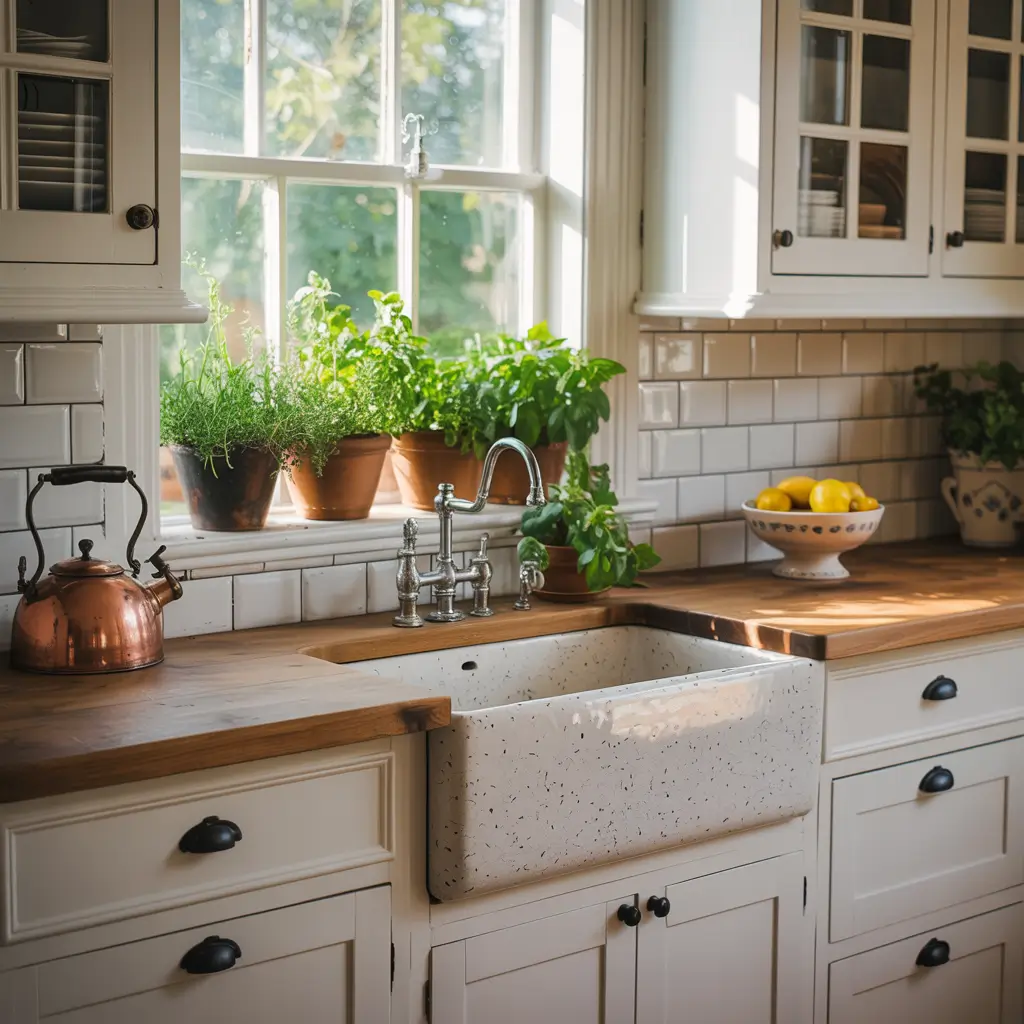
8. Handmade or Artisan White Subway Tile
Not all white subway tiles are created equal, and the difference between a mass-produced ceramic tile and a handmade artisan tile can be remarkable. Handmade tiles have slight irregularities in shape, thickness, and glaze coverage that give them an organic, crafted quality that no factory tile can replicate.
The glaze on a handmade tile is typically slightly uneven — thicker in some areas, thinner in others — which means light plays across the surface in a variable, almost impressionistic way. Run your hand across a wall of handmade white subway tiles and it feels alive. Run your hand across mass-produced tiles and it feels flat by comparison.
What to Expect from Handmade Tiles
- Slight size variations — expect to work with a wider and potentially more variable grout joint
- Higher cost per tile — plan for a 20 to 40 percent price premium over standard ceramic
- More wastage from irregular sizing — order 15 to 20 percent extra
- A result that looks genuinely one-of-a-kind — no two installations will ever be identical
✅ Pro Tip: Handmade tiles are at their best in spaces with natural light. The irregular glaze surface creates a subtle, constantly shifting quality as sunlight moves across it through the day — something no manufactured tile can replicate.
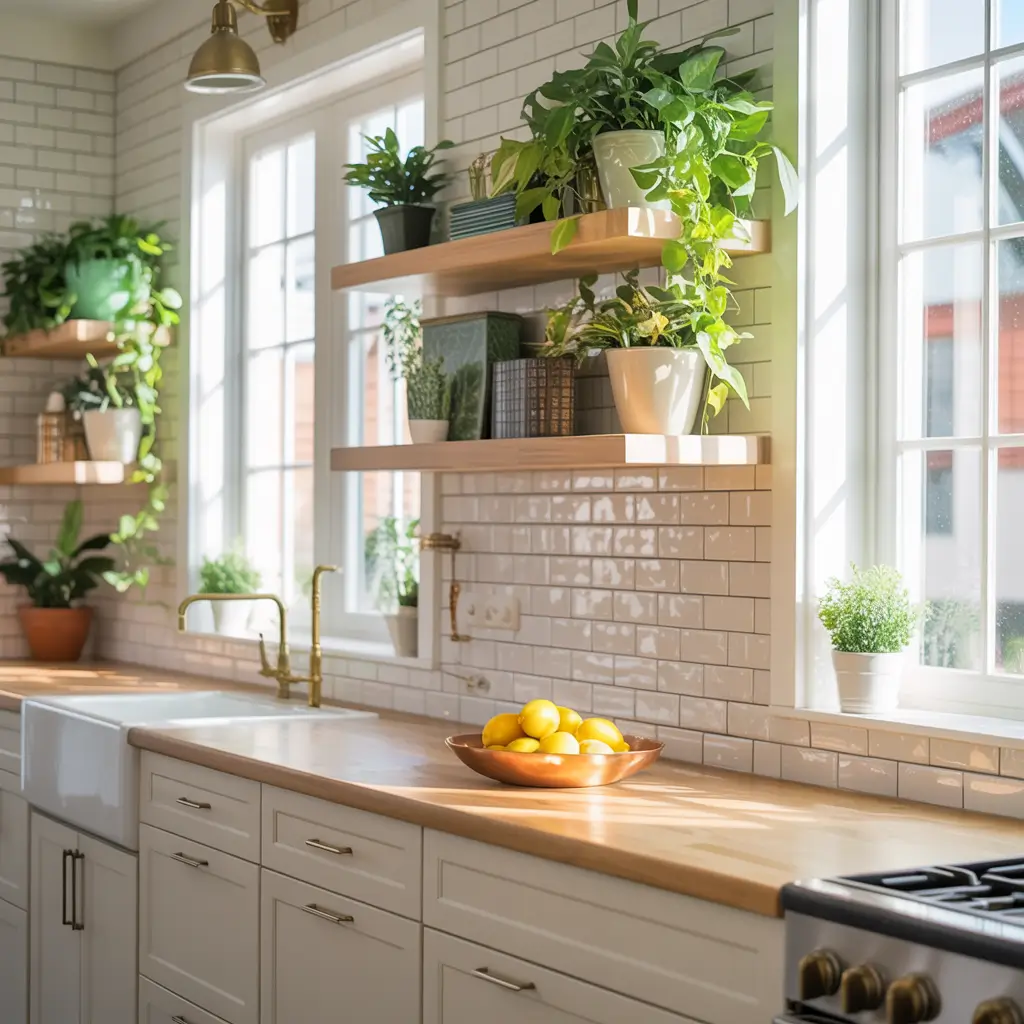
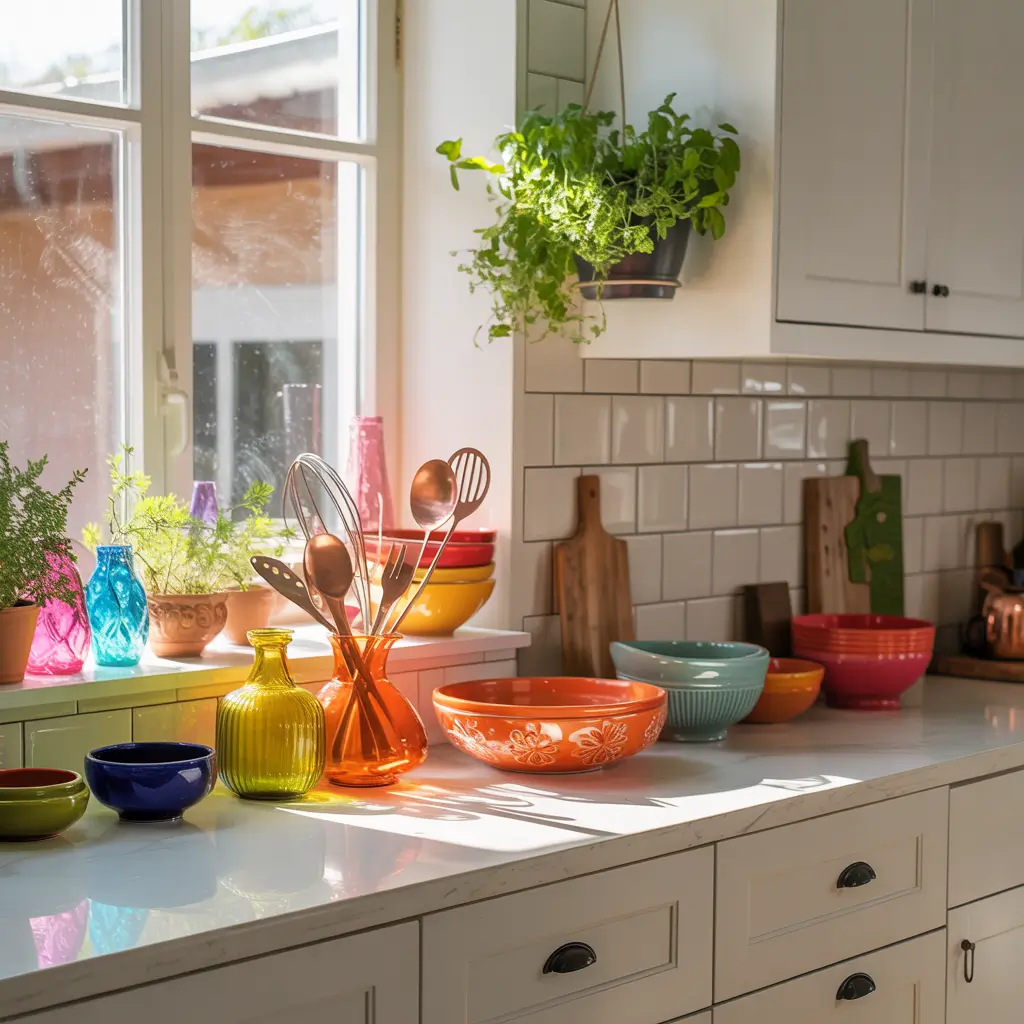
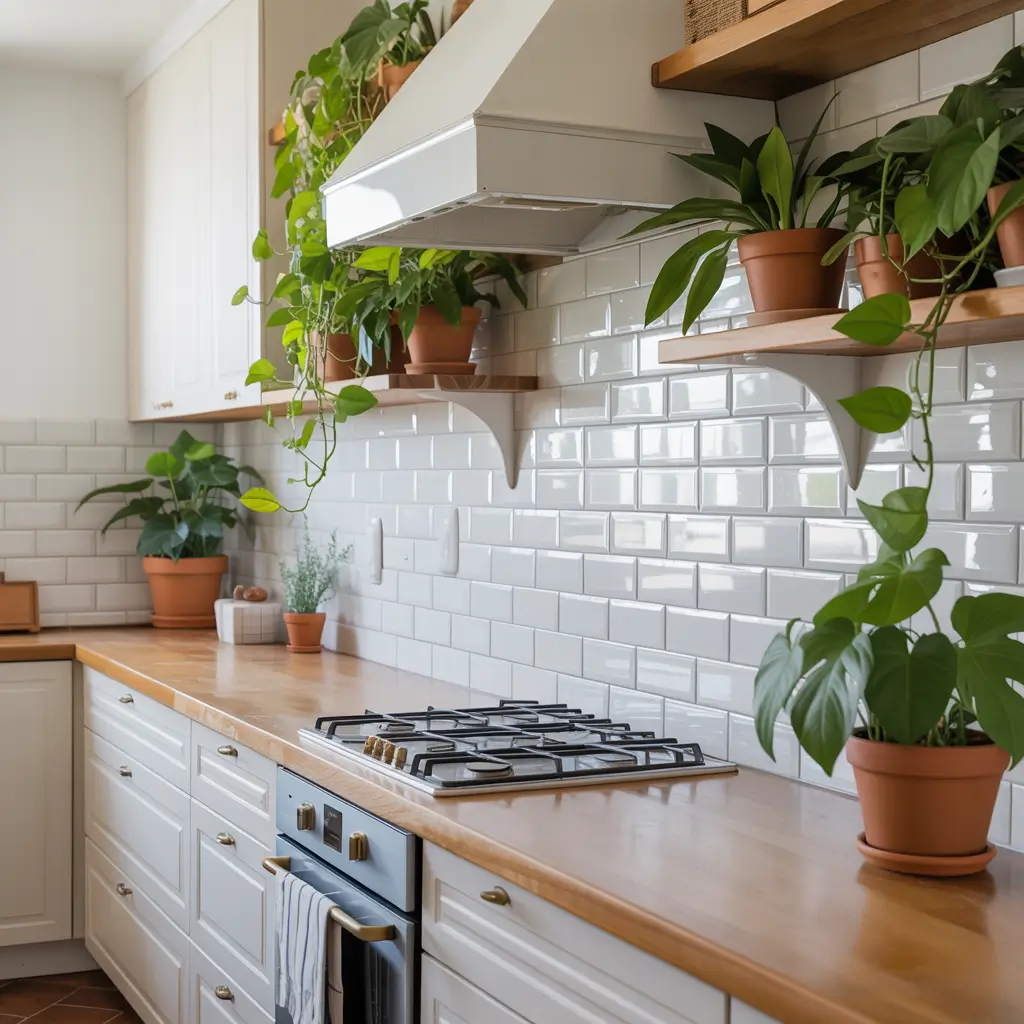
9. White Subway Tile with Floating Timber Shelves
The combination of white subway tile with natural timber floating shelves is one of those pairings that simply works, every time, in almost every kitchen context. The warmth and grain of natural wood against the cool crispness of white glazed tile creates a balance that feels both considered and completely natural.
The shelves provide an opportunity to introduce personality and colour through objects — ceramics, glassware, cookbooks, small plants, and favourite kitchen items that deserve to be on show. The white tile behind them provides a clean, neutral backdrop that makes everything displayed on the shelves look more intentional and curated.
Timber Species That Work Best Against White Subway Tile
- Natural oak — the most versatile, warm without being too orange
- Walnut — dark, rich, and dramatic against bright white tile
- Ash — pale and blonde, ideal for Scandinavian-inspired spaces
- Reclaimed pine or scaffolding boards — relaxed, rustic, and full of character
- Blackened or charred timber — a bold, contemporary contrast
Whatever timber you choose, seal the shelves properly before installation. Steam, condensation, and occasional water splashes are inevitable in any kitchen, and unsealed shelves will show watermarks and discolouration quickly.
10. White Subway Tile Behind Open Shelving Throughout

Rather than using open shelving as an accent against a partially tiled wall, some kitchens take the idea further and run white subway tile across the entire wall surface — behind and between shelves, cabinets, and appliances — so that the tile creates a continuous backdrop for the entire room.
This approach gives the kitchen a cohesive, gallery-like quality. Everything sits in front of white tile — the shelves, the objects on the shelves, the appliances, the sink. The eye moves across the space easily because there is no visual competition between different surfaces. It’s a particularly effective approach in open-plan kitchens where the cooking space is visible from living areas and needs to feel resolved and complete as a composition.
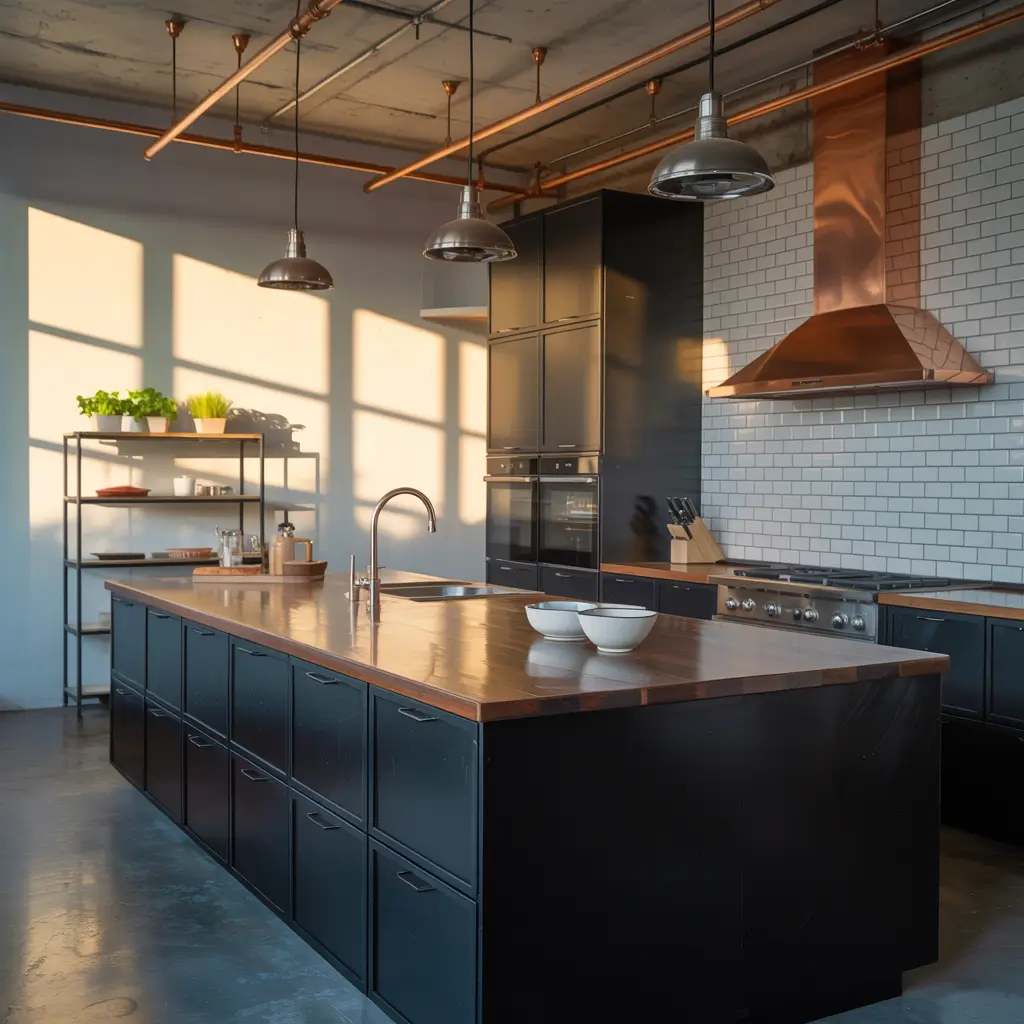
11. White Subway Tile with Black Cabinet Hardware
One of the most reliably successful combinations in contemporary kitchen design is white subway tile paired with matte black cabinet hardware. The sharp, graphic quality of matte black against white tile has a confident precision to it — clean, modern, and deeply satisfying to look at.
Matte black tapware, cabinet handles, shelf brackets, and pendant lights all reinforce each other against the white tile backdrop, creating a kitchen with a strong and coherent design identity. Nothing looks accidental; everything looks chosen.
This combination is particularly effective in kitchens with white or light grey cabinetry, where the matte black hardware provides the contrast that the cabinet colour itself cannot. Against darker cabinets, the white tile becomes the lightest element in the composition, and the black hardware reads as a continuation of the cabinet tone rather than a distinct accent.
✅ Pro Tip: When using matte black hardware against white subway tile, extend the finish to all metal elements — faucets, light switches, towel hooks, and bin handles. Consistency across every small detail is what makes this look feel truly designed rather than assembled.
12. White Subway Tile in a Basket Weave Pattern
The basket weave is a traditional tile pattern that pairs small square tiles with short rectangular tiles to create a woven visual effect. Using all-white subway tiles in this configuration produces a surface that has the familiarity of classic subway tile combined with a decorative complexity that elevates it into something quite special.
This pattern is best suited to traditional, Edwardian, or period-inspired kitchens where the decorative quality feels at home. In a very pared-back contemporary kitchen, the complexity of the basket weave can feel at odds with the simplicity of everything else. But in the right context, it’s a remarkably beautiful choice that reads as both historical and completely current.
13. Extra-Large White Subway Tile for a Modern Scale
The standard subway tile is 75mm by 150mm — approximately three by six inches. But subway tile is also produced in larger formats: 100mm by 300mm, 75mm by 300mm, and even 100mm by 400mm. These larger formats retain the defining rectangular proportions of the classic tile while creating a noticeably different character.
Larger tiles make a backsplash feel more architectural and less decorative. They suit contemporary kitchens with large-format countertops and clean cabinetry, where the proportions of everything are scaled up to match the generosity of the space. In a small kitchen, very large tiles can feel slightly out of scale — they work best when the room has the dimensions to absorb them.
Comparing Tile Sizes at a Glance
- 75mm x 150mm (standard) — classic, works everywhere, the most familiar proportion
- 75mm x 200mm — slightly elongated, subtly more contemporary
- 100mm x 300mm — distinctly modern, suits kitchens with high ceilings
- 75mm x 300mm — very slim and elongated, dramatic and elegant
- 100mm x 400mm — architectural scale, best in large or open-plan kitchens
14. White Subway Tile in a Kitchen Nook or Breakfast Corner
The subway tile backsplash doesn’t have to be limited to the main cooking wall. Extending white subway tile into a breakfast nook, built-in banquette corner, or coffee station area creates a sense of visual continuity that makes the kitchen feel larger and more integrated.
A tiled breakfast nook has a particularly charming quality — the crisp white tile gives the small space a clean, almost cafe-like character that makes morning routines feel a little more deliberate and pleasant. Pair with a timber bench seat, a simple pendant light, and a narrow floating shelf, and you have a genuinely lovely small space within the larger kitchen.
✅ Pro Tip: In a breakfast nook, consider taking the subway tile all the way around the three walls of the alcove rather than just one feature wall. The cocoon effect of three tiled walls makes the nook feel intentional and complete.
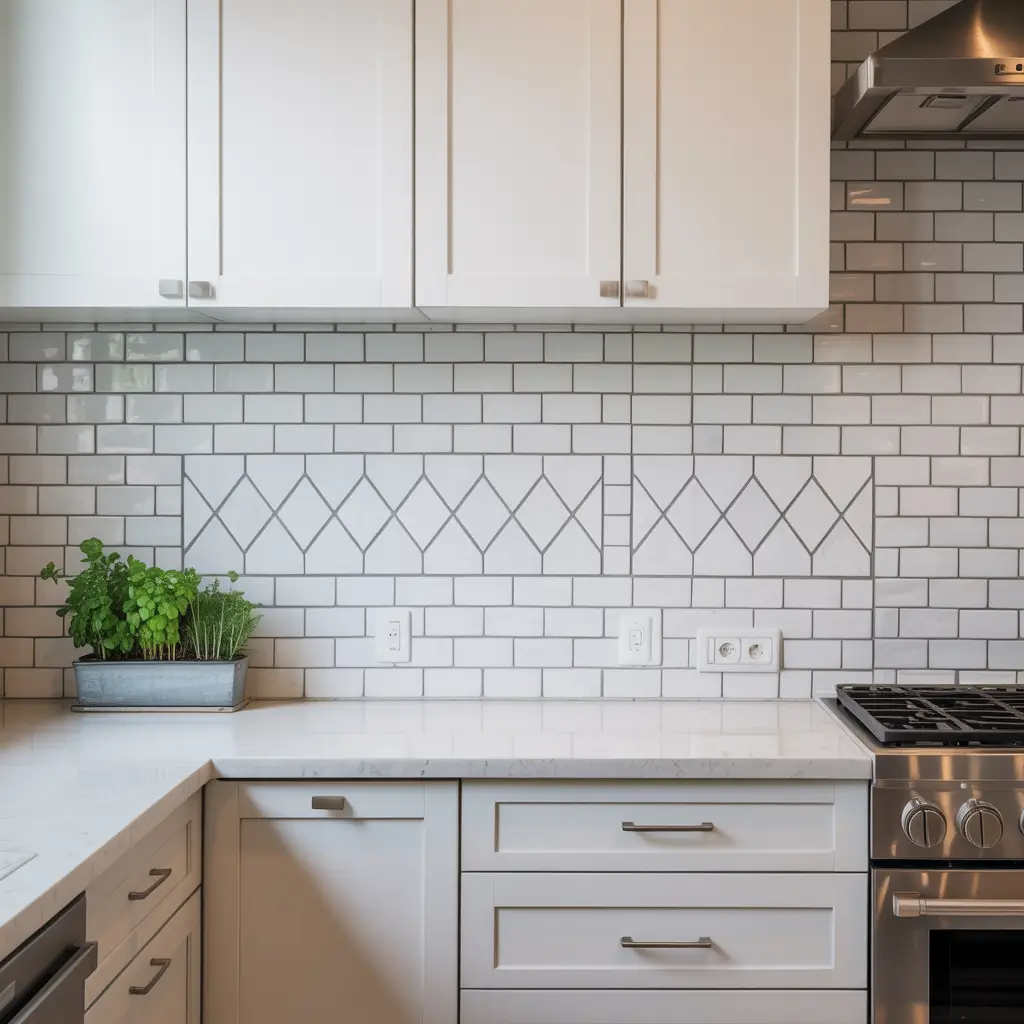
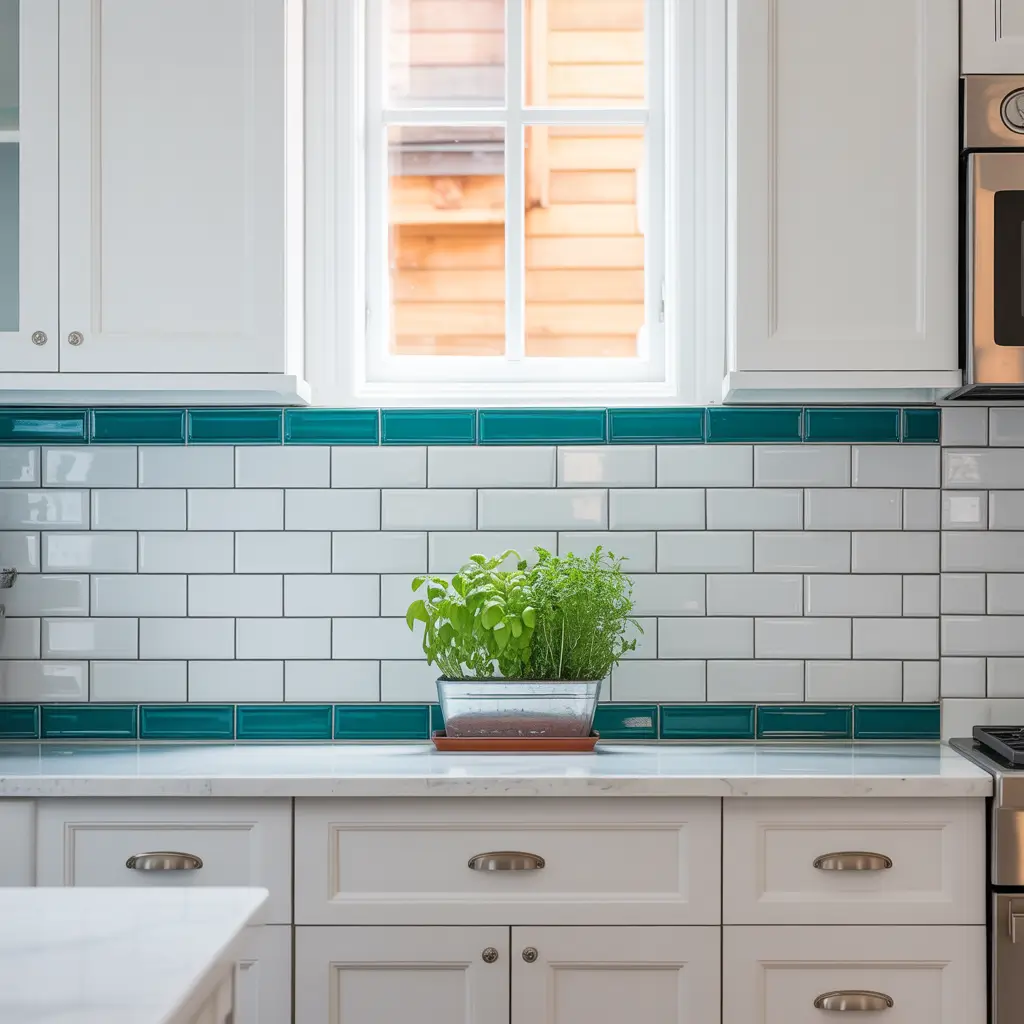
15. White Subway Tile with a Contrasting Feature Row
A single row of contrasting tiles inserted into a white subway tile backsplash can transform a plain surface into something with genuine visual interest and intention. The feature row acts as a horizontal band that breaks up the expanse of white tile and introduces a second material, colour, or texture.
The feature row is most effective when positioned at a natural visual level — typically at eye height, or at the level of the top of the counter return. A row of handpainted Delft-style tiles in a sea of white subway tile creates a kitchen with Dutch character and quiet charm. A row of iridescent glass tiles creates a ribbon of shifting colour. A row of dark pencil tiles creates a bold horizontal stripe.
The Complete Buying and Planning Guide for White Subway Tile
Before you order a single tile, there are several decisions that will shape the entire outcome of your backsplash. Working through these in the right order saves money, prevents expensive mistakes, and makes the installation process significantly smoother.
Step 1 — Choose Your Tile Format
Decide on the size and surface quality first. Are you working in a traditional space that would suit the warmth of a handmade tile? A contemporary kitchen that calls for a large-format rectified tile? A farmhouse kitchen that benefits from a bevelled or embossed surface? The tile format sets the visual character of everything that follows.
Step 2 — Select Your Laying Pattern
Your laying pattern choices are: traditional brick lay, vertical stack bond, herringbone, basket weave, or a combination with a feature row or border. The pattern should suit both the style of your kitchen and the shape of the wall you are tiling — herringbone, for example, works particularly well on tall, narrow walls.
Step 3 — Choose Your Grout
Grout colour is one of the most consequential decisions in the entire project. White or off-white grout maximises the seamless quality of the backsplash. Dark grout makes the grid graphic and prominent. Coloured grout adds personality. Take samples home and test them before ordering.
Step 4 — Calculate Your Quantity
Measure your backsplash area carefully, calculate the square meterage, then add a percentage for wastage and cuts. For a standard brick lay, add 10 percent. For herringbone, add 15 to 20 percent. For irregular spaces with many outlets and switches, add a further five percent.
Step 5 — Plan Your Fixtures Around the Tile
If you are installing a pot filler, open shelving, or other wall-mounted fixtures, plan their positions in relation to the tile layout before tiling begins. Ideally, fixture mounting points should fall on tile faces rather than grout joints.
7 Mistakes People Make with White Subway Tile Backsplashes
- Choosing grout colour in the shop rather than at home. Grout colours look different under showroom lighting. Always take samples home.
- Not ordering enough tile. Running short mid-installation and needing to reorder can cause colour batch differences that are visible in the finished wall. Always over-order.
- Skipping the tile adhesive quality. Budget adhesive on a kitchen backsplash behind a hob or in a steam-heavy environment will fail. Use a quality flexible adhesive rated for kitchen use.
- Ignoring the tile’s undertone. White subway tiles vary considerably in undertone — some are blue-white, some are cream, some are pink-white. The wrong undertone against your cabinetry or countertop can make the entire kitchen feel slightly ‘off’.
- Not sealing the grout. Kitchen grout is exposed to steam, oils, and food splashes daily. Unsealed grout discolours quickly. Always apply a quality grout sealer after installation and reseal annually in a hardworking kitchen.
- Installing without a layout plan. Starting from the wrong point or failing to centre the layout can result in awkward small cuts at the edges that make the finished installation look unresolved. Always plan the layout on paper before tiling.
- Choosing the wrong size tile for the space. Very large tiles in a small kitchen, or very small tiles in a large, high-ceilinged space, both look proportionally wrong. Match the tile size to the scale of the room.
Final Thoughts: Why White Subway Tile Deserves Its Reputation
The fact that white subway tile has been used in kitchens for over a hundred years and still appears fresh, relevant, and desirable is extraordinary. Design trends that survive a century don’t do so through fashion or luck — they survive because they solve a problem well, and because they offer genuine beauty at a price that most people can afford.
White subway tile does both. It brightens kitchens. It cleans easily. It suits almost every style. It works with any cabinet colour, any countertop material, any fitting finish. And — as the 20 ideas above demonstrate — it has enough creative range to feel genuinely new in each of those contexts.
The question is not whether white subway tile will work in your kitchen. It almost certainly will. The question is which of its many configurations will work best — and that’s a genuinely interesting design problem worth spending time on.
Take your time with the decisions that matter most: tile format, laying pattern, grout colour, and the fixtures that will share the wall with your tile. Get those right, and the result will be a kitchen backsplash that you’ll look at every morning with quiet satisfaction for years to come.
White subway tile is not the easy choice or the default choice. It’s the right choice. And there’s a meaningful difference between the two.
Frequently Asked Questions
What is the most popular grout colour for white subway tile?
Off-white or warm white grout remains the most widely used, as it creates a seamless, cohesive surface that maximises the sense of brightness and space. Charcoal and dark grey grout is the second most popular choice, valued for its graphic contrast and practical ability to hide everyday kitchen splashes and discolouration.
Is white subway tile suitable for behind a hob or range?
Yes — ceramic and porcelain subway tiles are heat-resistant and entirely suitable for use behind a hob or range cooker. Ensure the tile adhesive and grout are rated for high-temperature areas, and that the grout is properly sealed to prevent grease penetration. A full-height tile treatment behind a range also makes cleaning the most heavily splashed area of the kitchen considerably easier.
How do I keep white subway tile grout clean?
The most effective approach is regular maintenance rather than occasional deep cleaning. Wipe the backsplash down after cooking to remove splashes before they dry. Seal the grout with a quality penetrating sealer at installation and reseal annually. For stubborn staining, a paste of bicarbonate of soda and water applied with an old toothbrush and left for 15 minutes before rinsing works well on most grout types.
Can I use white subway tile in a rented property?
Tiling in a rented property typically requires your landlord’s permission. If you want the subway tile aesthetic without a permanent installation, peel-and-stick subway tile products have improved considerably in recent years and can provide a convincing approximation that can be removed without damage at the end of a tenancy. They are not as durable as genuine tile behind a hob, but for other areas of the kitchen they are a practical option.
What size subway tile is best for a standard kitchen?
The standard 75mm by 150mm tile remains the most versatile choice for a typical kitchen, suiting most cabinet heights and proportions comfortably. For kitchens with above-average ceiling heights or a particularly contemporary aesthetic, the 100mm by 300mm format provides a pleasingly modern scale. For very small kitchens, the standard size or smaller formats prevent the backsplash from feeling oversized.
How much does a white subway tile backsplash cost?
Costs vary considerably depending on tile quality, laying pattern, and whether you install yourself or hire a professional. Budget ceramic tiles start from a few pounds per square metre and can be found for less in discount tile shops. Mid-range handmade or bevelled tiles typically cost between fifteen and forty pounds per square metre. Professional installation adds further cost depending on your location and the complexity of the layout. As a rough guide, a typical kitchen backsplash can be completed for between two hundred and one thousand five hundred pounds, depending on all these variables.
1 thought on “WHITE SUBWAY TILE KITCHEN BACKSPLASH IDEAS”